Red Velvet Cookie Bars Recipe
Introduction
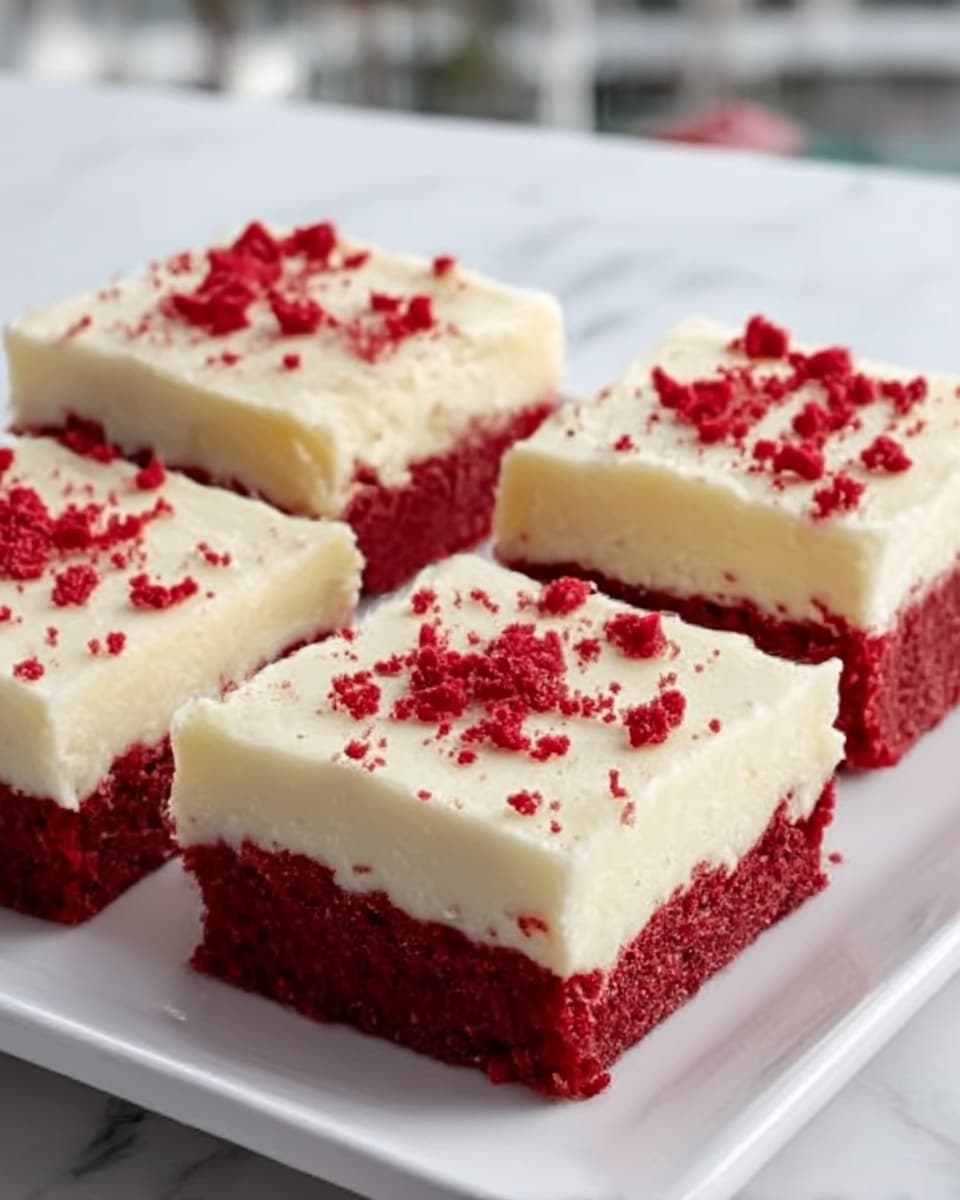
Red Velvet Cookie Bars combine the rich, velvety flavor of classic red velvet cake with the chewy texture of cookie bars. Topped with a creamy cream cheese frosting, they make a perfect treat for any occasion.
Ingredients
- 1 cup unsalted butter
- 1 cup granulated sugar
- 0.5 cup brown sugar
- 2 large eggs
- 2 teaspoons vanilla extract
- 2 tablespoons red gel food coloring
- 2 tablespoons unsweetened cocoa powder
- 2.5 cups all-purpose flour
- 1 teaspoon baking powder
- 0.5 teaspoon salt
- 8 oz cream cheese
- 0.5 cup unsalted butter (for frosting)
- 2 cups powdered sugar
- 2 tablespoons milk
Instructions
- Step 1: Preheat your oven to 350°F (175°C) and line a 9×13-inch baking dish with parchment paper.
- Step 2: In a large bowl, cream together 1 cup unsalted butter, 1 cup granulated sugar, and 0.5 cup brown sugar until light and fluffy.
- Step 3: Beat in 2 large eggs, 2 teaspoons vanilla extract, and 2 tablespoons red gel food coloring until well combined.
- Step 4: In a separate bowl, whisk together 2 tablespoons cocoa powder, 2.5 cups all-purpose flour, 1 teaspoon baking powder, and 0.5 teaspoon salt.
- Step 5: Gradually mix the dry ingredients into the wet mixture until a thick dough forms.
- Step 6: Spread the dough evenly into the prepared baking pan and bake for 22–25 minutes or until set.
- Step 7: Let the bars cool completely in the pan.
- Step 8: To make the frosting, beat 8 oz cream cheese and 0.5 cup unsalted butter until creamy.
- Step 9: Add 2 cups powdered sugar and 2 tablespoons milk, beating until fluffy.
- Step 10: Frost the cooled bars and top with red velvet crumbs if desired. Slice and serve.
Tips & Variations
- For a more intense red color, add an extra tablespoon of red gel food coloring.
- You can substitute cream cheese frosting with a simple vanilla buttercream if preferred.
- Adding white chocolate chips to the dough adds a lovely contrast in flavor.
- Be careful not to overbake; bars should be set but still moist for the best texture.
Storage
Store the frosted cookie bars in an airtight container in the refrigerator for up to 5 days. Let them come to room temperature before serving, or warm slightly in the microwave for 10–15 seconds. These bars can also be frozen without frosting for up to 3 months; thaw before frosting and serving.
How to Serve
Serve this delicious recipe with your favorite sides.
FAQs
Can I use regular red food coloring instead of gel?
Yes, but gel food coloring provides a more vibrant color without adding extra liquid, which helps maintain the dough’s consistency.
Can I make these bars dairy-free?
To make dairy-free red velvet cookie bars, substitute the butter and cream cheese with plant-based alternatives, such as vegan margarine and vegan cream cheese, respectively.
PrintRed Velvet Cookie Bars Recipe

Delight in these luscious Red Velvet Cookie Bars featuring a rich, tender red velvet base topped with a creamy, tangy cream cheese frosting. Perfect for gatherings or a sweet treat any day!
- Prep Time: 15 minutes
- Cook Time: 22 to 25 minutes
- Total Time: 40 minutes
- Yield: 12 to 16 bars 1x
- Category: Dessert
- Method: Baking
- Cuisine: American
Ingredients
Cookie Bars
- 1 cup unsalted butter
- 1 cup granulated sugar
- 0.5 cup brown sugar
- 2 large eggs
- 2 teaspoons vanilla extract
- 2 tablespoons red gel food coloring
- 2 tablespoons unsweetened cocoa powder
- 2.5 cups all-purpose flour
- 1 teaspoon baking powder
- 0.5 teaspoon salt
Frosting
- 8 oz cream cheese
- 0.5 cup unsalted butter
- 2 cups powdered sugar
- 2 tablespoons milk
Instructions
- Preheat Oven: Preheat your oven to 350°F (175°C) and line a 9×13-inch baking dish with parchment paper to ensure easy removal of the cookie bars.
- Cream Butter and Sugars: In a large bowl, cream together 1 cup unsalted butter, 1 cup granulated sugar, and 0.5 cup brown sugar until the mixture is light and fluffy, creating a smooth base for the dough.
- Add Wet Ingredients: Beat in 2 large eggs, 2 teaspoons vanilla extract, and 2 tablespoons red gel food coloring until all ingredients are well combined, giving the dough its classic red color.
- Mix Dry Ingredients: In a separate bowl, whisk together 2 tablespoons unsweetened cocoa powder, 2.5 cups all-purpose flour, 1 teaspoon baking powder, and 0.5 teaspoon salt to evenly distribute the leavening and flavor components.
- Combine Ingredients: Gradually mix the dry ingredients into the wet mixture until a thick, homogeneous dough forms, ensuring there are no flour pockets.
- Spread and Bake: Spread the dough evenly into the prepared 9×13-inch baking pan and bake in the preheated oven for 22–25 minutes or until set and a toothpick inserted comes out clean.
- Cool: Remove the cookie bars from the oven and allow them to cool completely in the pan to set the texture and make frosting application easier.
- Prepare Frosting: Beat 8 oz cream cheese and 0.5 cup unsalted butter until creamy and smooth, forming the base of the luscious frosting.
- Add Sugar and Milk: Add 2 cups powdered sugar and 2 tablespoons milk, beating until the frosting is light, fluffy, and spreadable.
- Frost and Serve: Spread the cream cheese frosting evenly over the cooled bars. Optionally, sprinkle red velvet crumbs on top for extra texture and color. Slice into bars and serve.
Notes
- Use red gel food coloring for the most vibrant color without thinning the dough.
- Ensure bars are completely cooled before frosting to prevent melting.
- For added crunch, consider mixing chopped pecans into the dough.
- Store frosted bars in an airtight container refrigerated for up to 4 days.
- Bring refrigerated bars to room temperature before serving for best texture.
Keywords: red velvet cookie bars, cream cheese frosting, red velvet dessert, easy dessert bars, holiday dessert