Old-Fashioned Butter Mints Recipe
Introduction
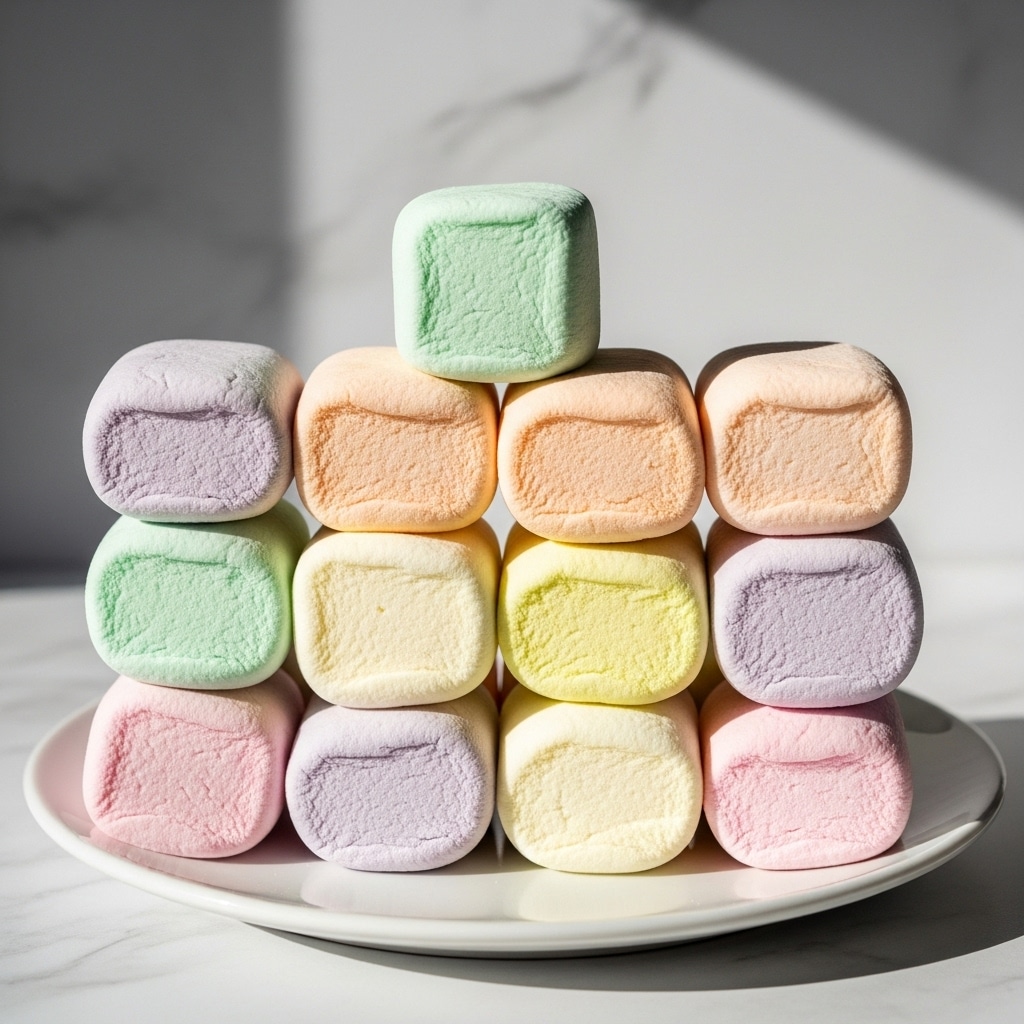
Old-Fashioned Butter Mints are a nostalgic treat with a smooth, creamy texture and refreshing peppermint flavor. These melt-in-your-mouth candies are easy to make at home and perfect for gifting or enjoying anytime.

Ingredients
- 1/2 cup unsalted butter, softened
- 4 cups powdered sugar
- 1/4 cup sweetened condensed milk
- 1 teaspoon peppermint extract
- Food coloring (optional)
Instructions
- Step 1: In a mixing bowl, cream the softened butter until smooth.
- Step 2: Gradually add the powdered sugar, mixing until well combined.
- Step 3: Add the sweetened condensed milk and peppermint extract, then mix until smooth.
- Step 4: If desired, divide the mixture and add food coloring to create different colors.
- Step 5: Pinch off small amounts of the mixture and roll into balls or shapes.
- Step 6: Place the shaped mints on a parchment-lined baking sheet.
- Step 7: Allow the mints to dry for at least 24 hours before serving.
Tips & Variations
- For a firmer texture, let the mints dry in a cool, dry place rather than refrigerating.
- Try using different extracts like vanilla or almond for unique flavors.
- Add a few drops of food coloring to create festive colors for holidays or parties.
- Shape mints using small cookie cutters for a decorative touch.
Storage
Store butter mints in an airtight container at room temperature for up to two weeks. Avoid refrigerating as moisture can soften the texture. If necessary, let mints dry longer before storing. They do not require reheating.
How to Serve
Serve this delicious recipe with your favorite sides.
FAQs
Can I use salted butter instead of unsalted?
Using salted butter may slightly alter the sweetness and flavor balance. For best results, stick with unsalted butter to keep the mints delicately sweet and smooth.
How long do butter mints need to dry?
Butter mints should dry for at least 24 hours at room temperature to develop their characteristic texture before serving.
PrintOld-Fashioned Butter Mints Recipe

Old-Fashioned Butter Mints are a delightful melt-in-your-mouth candy made from a creamy blend of butter, powdered sugar, sweetened condensed milk, and peppermint extract. These small, colorful mints are perfect for special occasions or as a charming homemade treat that requires no baking.
- Prep Time: 15 minutes
- Cook Time: 0 minutes
- Total Time: 24 hours 15 minutes
- Yield: About 60 small mints 1x
- Category: Candy
- Method: No-Cook
- Cuisine: American
Ingredients
Ingredients
- 1/2 cup unsalted butter, softened
- 4 cups powdered sugar
- 1/4 cup sweetened condensed milk
- 1 teaspoon peppermint extract
- Food coloring (optional)
Instructions
- Cream the Butter: In a mixing bowl, cream the softened butter until it is smooth and fluffy, creating a creamy base for the mints.
- Add Powdered Sugar: Gradually add the powdered sugar to the creamed butter, mixing continuously until the mixture is well combined and thickened.
- Incorporate Liquids: Add the sweetened condensed milk and peppermint extract to the sugar and butter mixture. Mix thoroughly until the texture is smooth and consistent.
- Optional Coloring: If desired, divide the mixture into portions and add food coloring to each to create a variety of colored mints.
- Shape the Mints: Pinch off small amounts of the mixture and roll each into balls or mold into your preferred shapes using your fingers or tools.
- Prepare for Drying: Place the shaped mints onto a parchment-lined baking sheet, spacing them so they do not touch.
- Dry the Mints: Allow the butter mints to dry at room temperature for at least 24 hours. This drying time helps the mints to set and develop their signature firm yet tender texture before serving.
Notes
- You can store the butter mints in an airtight container for up to two weeks.
- Adding different food colorings is a fun way to customize your mints for holidays or special events.
- If the mixture feels too sticky, refrigerate it briefly to make shaping easier.
- Ensure the butter is softened but not melted for best texture.
Keywords: butter mints, old fashioned candy, peppermint mints, homemade candy, no cook candy