Garlic Parmesan Cheeseburger Bombs Recipe
Introduction
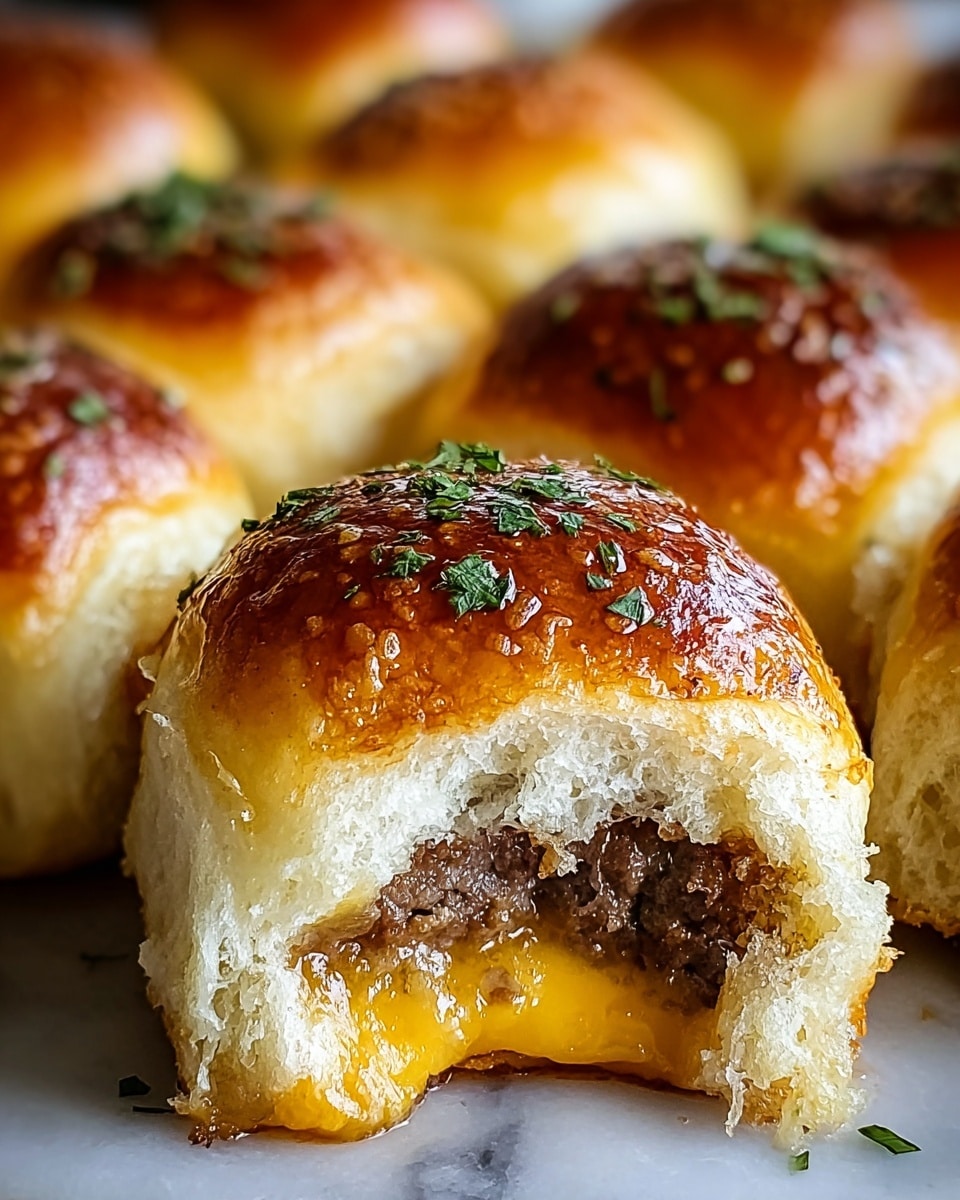
Garlic Parmesan Cheeseburger Bombs are a delicious and fun twist on the classic cheeseburger. These bite-sized pockets are filled with savory ground beef, melted cheese, and aromatic garlic, making them perfect for a quick snack or appetizer.

Ingredients
- 1 lb ground beef (80/20)
- 4 garlic cloves, crushed
- 1 cup shredded mozzarella or cheddar cheese
- 1 can (16 oz) refrigerated biscuits
- 1/2 cup grated parmesan cheese
- 1 tsp Italian seasoning
Instructions
- Step 1: Preheat your oven to 375°F (190°C).
- Step 2: In a skillet over medium heat, cook the ground beef and crushed garlic until the beef is browned. Drain any excess fat.
- Step 3: Stir in Italian seasoning and shredded cheese, cooking until the cheese is melted and the mixture is well combined.
- Step 4: Flatten each biscuit into a circle about 4 inches wide using your hands or a rolling pin.
- Step 5: Place two tablespoons of the beef mixture in the center of each biscuit circle. Fold the biscuit edges over the filling and pinch to seal tightly.
- Step 6: Arrange the sealed bombs on a greased baking sheet, leaving some space between them. Bake for 12-15 minutes, or until golden brown.
- Step 7: Remove from oven and sprinkle the tops with grated parmesan cheese before serving.
Tips & Variations
- For extra flavor, add a few dashes of Worcestershire sauce to the beef mixture while cooking.
- Try mixing in chopped onions or bell peppers with the beef for added texture.
- Serve with ketchup, mustard, or your favorite dipping sauce on the side.
- Use different cheeses like pepper jack or smoked gouda for a flavor twist.
Storage
Store leftover cheeseburger bombs in an airtight container in the refrigerator for up to 3 days. Reheat in the oven at 350°F (175°C) for 8-10 minutes or until warmed through to keep the crust crispy. Avoid microwaving to prevent sogginess.
How to Serve
Serve this delicious recipe with your favorite sides.
FAQs
Can I make these ahead of time?
Yes, you can assemble the bombs and keep them refrigerated for a few hours before baking. Just bake them fresh to maintain the best texture and flavor.
Can I freeze the cheeseburger bombs?
Absolutely. Freeze baked bombs in a sealed container for up to 2 months. Reheat in the oven from frozen for best results.
PrintGarlic Parmesan Cheeseburger Bombs Recipe

These Garlic Parmesan Cheeseburger Bombs are a delicious and easy-to-make appetizer or snack featuring juicy ground beef, garlic, melted cheese, and Italian seasoning all wrapped in flaky biscuit dough and baked to golden perfection. Perfect for parties, game days, or a fun family dinner.
- Prep Time: 10 minutes
- Cook Time: 15 minutes
- Total Time: 25 minutes
- Yield: 8 cheeseburger bombs 1x
- Category: Appetizer
- Method: Baking
- Cuisine: American
Ingredients
Meat Mixture
- 1 lb ground beef (80/20)
- 4 garlic cloves, crushed
- 1 tsp Italian seasoning
- 1 cup shredded mozzarella or cheddar cheese
Dough
- 1 can (16 oz) refrigerated biscuits
Topping
- 1/2 cup grated parmesan cheese
Instructions
- Preheat the oven: Preheat your oven to 375°F (190°C) to ensure it’s hot and ready for baking the cheeseburger bombs.
- Cook the beef and garlic: In a skillet over medium heat, cook the ground beef along with the crushed garlic cloves until the beef is fully browned. Drain any excess fat from the skillet to avoid sogginess.
- Season and combine cheese: Stir the Italian seasoning and shredded mozzarella or cheddar cheese into the browned beef mixture. Continue cooking until the cheese has fully melted and incorporated.
- Prepare biscuit dough: Take each refrigerated biscuit and flatten it into a circle approximately 4 inches wide. This will make it easier to wrap around the filling.
- Fill and seal: Spoon about two tablespoons of the beef and cheese mixture into the center of each biscuit circle. Fold the edges over the filling and pinch to seal tightly, creating a stuffed dough ball.
- Bake: Place the sealed biscuit bombs onto a greased baking sheet spaced apart. Bake in the preheated oven for 12-15 minutes or until the biscuits are golden brown and cooked through.
- Add parmesan and serve: Immediately after baking, sprinkle the tops generously with grated parmesan cheese. Serve warm for the best taste and texture.
Notes
- Using 80/20 ground beef provides a good balance of flavor and moisture.
- You can substitute mozzarella with cheddar or a blend for different flavors.
- Ensure the biscuit edges are sealed well to prevent filling from leaking during baking.
- Can be served with dipping sauces such as marinara, ranch, or ketchup.
- Make sure to drain excess fat from cooked beef to avoid greasy bombs.
Keywords: Garlic Parmesan, Cheeseburger Bombs, Appetizer, Ground Beef, Baked Biscuits, Party Food, Easy Recipe