No-Bake Chocolate Peppermint Squares Recipe
Introduction
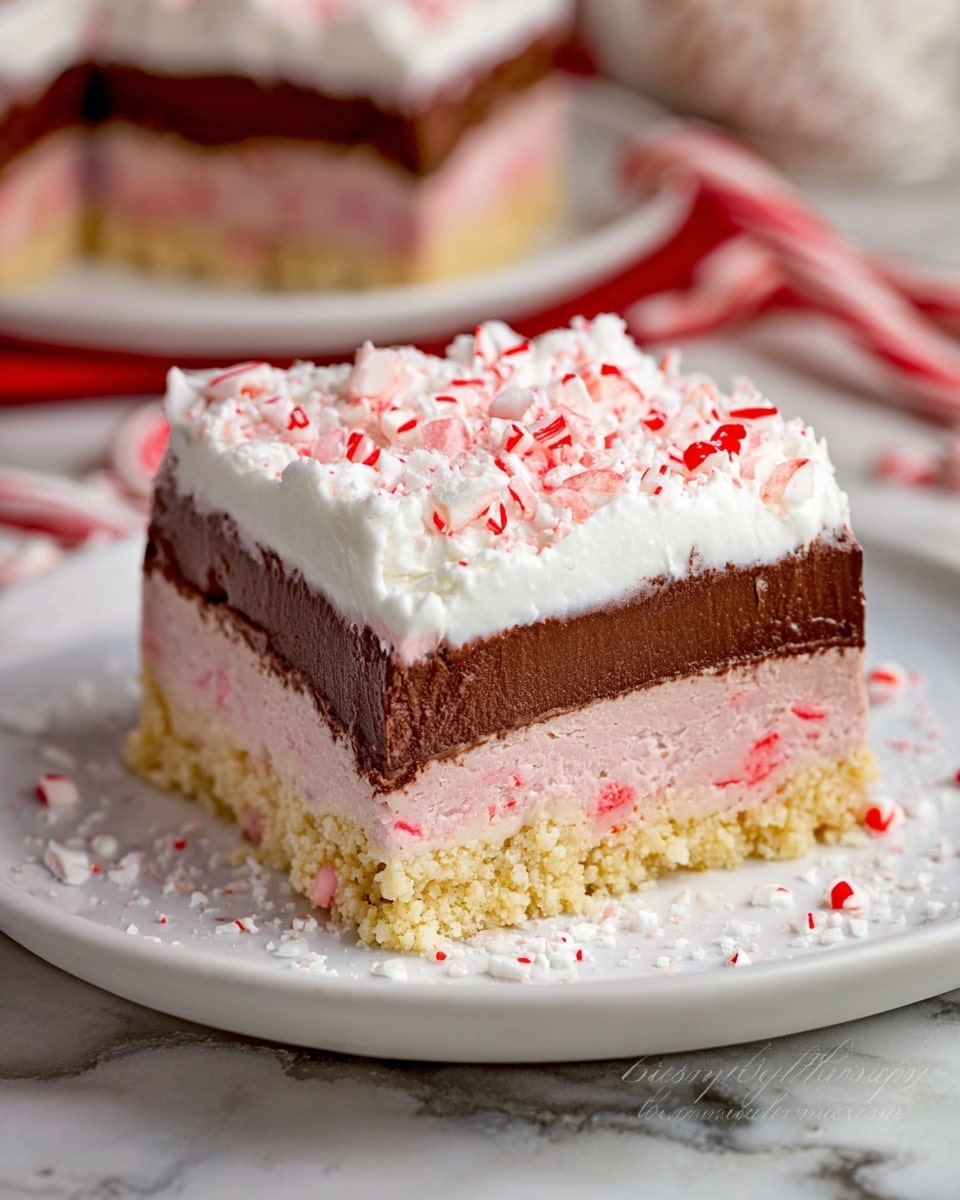
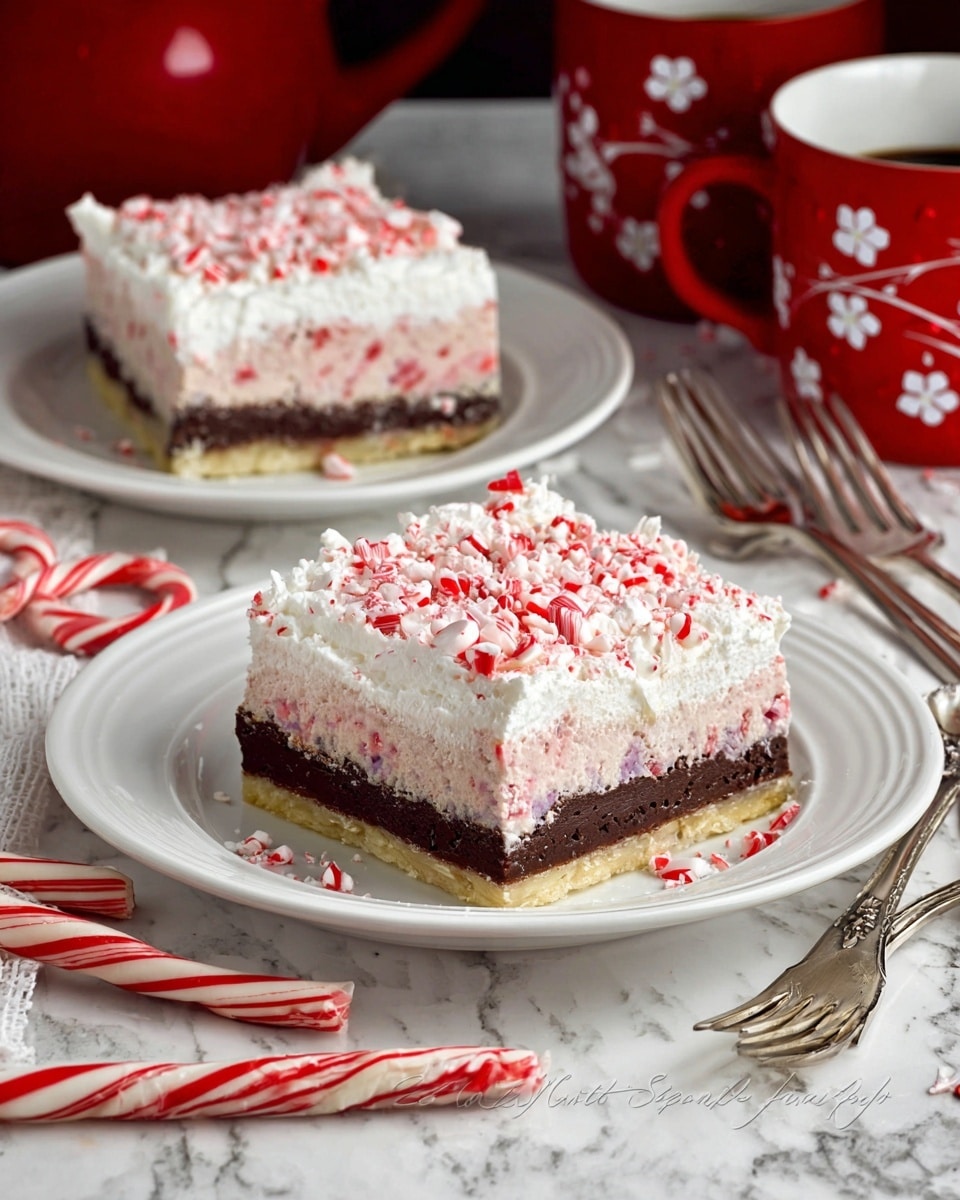
No-Bake Chocolate Peppermint Squares offer a delightful combination of creamy layers and festive peppermint flavor. This easy dessert requires no oven time and showcases a crunchy crust topped with peppermint cream and rich chocolate pudding. Perfect for holiday gatherings or any time you want a cool, refreshing treat.
Ingredients
- 1 1/2 cups vanilla wafer crumbs
- 1/4 cup (1/2 stick) unsalted butter
- 2 tablespoons sugar
- 8 ounces cream cheese, softened
- 1/2 cup finely crushed peppermint candy cane or starlight mints
- 2 tablespoons milk
- 1/3 cup sugar
- 1 1/4 cups whipped topping
- 1 package (4-serving size) instant chocolate pudding
- 1 3/4 cups milk
- 8 ounces whipped topping (1 tub)
- 1/4 cup coarsely chopped peppermint candy cane
Instructions
- Step 1: Mix the vanilla wafer crumbs, melted butter, and 2 tablespoons sugar until well combined. Press the mixture firmly into the bottom of a 9 x 9-inch pan to form the crust. Refrigerate while preparing the next layers.
- Step 2: For the peppermint layer, beat the softened cream cheese with 2 tablespoons milk until smooth and silky. Add 1/3 cup sugar and finely crushed peppermint candy; beat well. Gently fold in 1 1/4 cups whipped topping. Spread this mixture evenly over the chilled crust.
- Step 3: Prepare the chocolate layer by beating the instant chocolate pudding mix with 1 3/4 cups milk for 2 minutes until thickened. Spread this pudding layer over the peppermint cream layer. Let it set for 5 to 10 minutes.
- Step 4: Spread the remaining 8 ounces (1 tub) of whipped topping over the chocolate layer. Sprinkle the top with coarsely chopped peppermint candy cane for garnish.
- Step 5: Refrigerate the dessert for at least 4 hours to allow it to set and the flavors to meld. For an extra special touch, freeze it for 4 hours instead to enjoy it like an ice cream cake.
Tips & Variations
- Use crushed peppermint candies for a stronger mint flavor or substitute with crushed Andes mints for a chocolate-mint twist.
- For a gluten-free version, use gluten-free vanilla cookies instead of vanilla wafer crumbs.
- Chilling the crust before adding the layers helps prevent mixing and keeps layers distinct.
Storage
Store the squares covered in the refrigerator for up to 3 days. If frozen, keep them wrapped well and consume within 1 week for best taste. Thaw in the refrigerator for about 30 minutes before serving if frozen.
How to Serve
Serve this delicious recipe with your favorite sides.
FAQs
Can I use regular peppermint candy instead of candy canes?
Yes, finely crushed peppermint candies or starlight mints work just as well and add a nice flavor and texture to the layers.
Do I have to freeze the dessert?
No, refrigerating for at least 4 hours is enough to set the dessert properly. Freezing is optional if you prefer a firmer, ice cream cake–style texture.
PrintNo-Bake Chocolate Peppermint Squares Recipe

Delight in these No-Bake Chocolate Peppermint Squares, a festive and creamy layered dessert combining a crunchy vanilla wafer crust, a peppermint cream cheese layer, rich chocolate pudding, and fluffy whipped topping, finished with crushed peppermint candies for a refreshing holiday treat.
- Prep Time: 20 minutes
- Cook Time: 0 minutes
- Total Time: 4 hours 20 minutes (including chilling time)
- Yield: 9 servings 1x
- Category: Dessert
- Method: No-Cook
- Cuisine: American
- Diet: Vegetarian
Ingredients
Crust
- 1 1/2 cups vanilla wafer crumbs
- 1/4 cup (1/2 stick) unsalted butter, melted
- 2 tablespoons sugar
Peppermint Layer
- 8 oz cream cheese, softened
- 2 tablespoons milk
- 1/3 cup sugar
- 1/2 cup finely crushed peppermint candy cane or starlight mints
- 1 1/4 cups whipped topping
Chocolate Layer
- 1 package (4-serving size) instant chocolate pudding mix
- 1 3/4 cups milk
Topping
- 8 oz (1 tub) whipped topping
- 1/4 cup coarsely chopped peppermint candy cane
Instructions
- Prepare Tubs of Whipped Topping: Ensure you have 2 tubs (8 oz each) of whipped topping or one larger 12-ounce container ready, though you may not use all of it.
- Make the Crust: In a bowl, mix vanilla wafer crumbs, melted unsalted butter, and sugar thoroughly until combined. Press the mixture firmly into the bottom of a 9 x 9-inch pan to form an even crust. Refrigerate the crust while preparing the next layer to set properly.
- Prepare the Peppermint Layer: Beat softened cream cheese and milk together until the mixture becomes smooth and silky. Add sugar and finely crushed peppermint candy, then beat well to incorporate all ingredients. Gently fold in 1 1/4 cups of whipped topping until blended. Spread this peppermint cream cheese mixture evenly over the chilled crust in the pan.
- Make the Chocolate Layer: In a separate bowl, whisk the instant chocolate pudding mix with 1 3/4 cups milk for 2 minutes, allowing it to thicken. Spread the chocolate pudding layer evenly on top of the peppermint cheese layer. Let the pudding set for 5 to 10 minutes.
- Add the Final Topping: Spread the remaining tub of whipped topping over the chocolate pudding layer. Sprinkle the top generously with coarsely chopped peppermint candy cane for texture and festive flavor.
- Chill to Set: Refrigerate the completed dessert for at least 4 hours to allow all layers to firm up and flavors to meld.
- Optional Freezing: For a special touch and a firmer, ice cream cake-like texture, freeze the dessert for 4 hours instead of refrigerating.
Notes
- You may substitute crushed peppermint candy canes with starlight mints for similar flavor.
- If you freeze the dessert, allow it to sit at room temperature for 10-15 minutes before serving for easier slicing.
- Use room temperature cream cheese to ensure smooth mixing without lumps.
- The dessert can be stored in the refrigerator for up to 3 days, or in the freezer up to a week.
- For an added touch, garnish with chocolate shavings or drizzle chocolate syrup before serving.
Keywords: no-bake dessert, peppermint dessert, chocolate peppermint squares, holiday dessert, layered pudding dessert