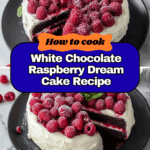
White Chocolate Raspberry Dream Cake Recipe
There is nothing quite like the delightful indulgence of the White Chocolate Raspberry Dream Cake. This cake truly earns its name, bringing together the creamy sweetness of white chocolate with the tart brightness of fresh raspberries in a luscious, moist cake. Whether you are celebrating a special occasion or simply craving something extraordinary, this cake delivers on flavor, texture, and beauty with every bite. The dreamy combination of fluffy layers, rich white chocolate, and vibrant raspberry filling makes it a showstopper that everyone will adore.
Ingredients You’ll Need
The magic of the White Chocolate Raspberry Dream Cake lies in its simple yet thoughtfully chosen ingredients. Each one plays a crucial role in building layers of flavor, perfect texture, and stunning color that make this cake unforgettable.
- All-purpose flour: The base for the cake, providing structure and softness.
- Baking powder and baking soda: Responsible for the light, airy rise that keeps the cake tender.
- Salt: Enhances all the flavors and balances the sweetness.
- Unsalted butter: Adds richness and moisture for a melt-in-your-mouth crumb.
- Granulated sugar: Sweetens the cake while helping with texture.
- Eggs: Bind the ingredients and add cakey fluffiness.
- Vanilla extract: Adds warmth and depth to every bite.
- Whole milk and sour cream: Deliver moisture and a subtle tang for balance and tenderness.
- White chocolate (melted): Infuses the batter with creamy sweetness and that signature dreamy flavor.
- Fresh raspberries: Bring vibrant color and refreshing tartness to the cake layers and topping.
- Raspberry jam: Intensifies berry flavor and acts as a luscious filling.
- Heavy whipping cream: Whipped into fluffy clouds of creaminess for frosting and layering.
- Powdered sugar: Sweetens the whipped cream without graininess.
How to Make White Chocolate Raspberry Dream Cake
Step 1: Prepare and Mix Dry Ingredients
Start by whisking together the all-purpose flour, baking powder, baking soda, and salt in a bowl until well combined. This ensures that the leavening agents and seasoning are evenly distributed, which is essential for an even rise and perfectly balanced flavor in your White Chocolate Raspberry Dream Cake.
Step 2: Cream Butter and Sugar
Using an electric mixer, beat the unsalted butter and granulated sugar on medium speed until light and fluffy. This step is crucial because creaming incorporates air into the butter, creating the fine crumb and tender texture that makes this cake so divine.
Step 3: Add Eggs and Vanilla
Beat in the eggs one at a time, ensuring each is fully incorporated before adding the next. Then mix in the vanilla extract. This adds structure and moisture to the batter while enhancing the cake’s flavor with its warm, aromatic notes.
Step 4: Combine Milk and Sour Cream
In a separate bowl, stir together the whole milk and sour cream until smooth. This mixture keeps the cake wonderfully moist and adds a subtle tang that balances the sweetness of the white chocolate and raspberries.
Step 5: Alternate Adding Dry Ingredients and Milk Mixture
Gradually add the dry ingredients to the butter mixture in three parts, alternating with the milk and sour cream mixture in two. Begin and end with the dry ingredients. Beat everything just until combined to avoid overmixing, which could make the cake dense rather than dreamy.
Step 6: Fold in Melted White Chocolate
Gently fold in the melted white chocolate with a spatula. This step ensures a smooth, creamy batter without losing the air you worked so hard to build. The white chocolate brings the signature richness that defines the White Chocolate Raspberry Dream Cake.
Step 7: Bake the Cake Layers
Divide the batter evenly between two greased and floured 9-inch cake pans. Smooth the tops with a spatula to ensure even baking. Bake at 350°F (175°C) for 25 to 30 minutes, or until a toothpick inserted into the center comes out clean. Allow the cakes to cool in the pans for 10 minutes before transferring them to wire racks to cool completely.
Step 8: Prepare Raspberry Filling and Whipped Cream
While the cakes cool, mash fresh raspberries until broken down, then stir in raspberry jam for an intensely fruity filling. For the frosting, whip heavy cream with powdered sugar and vanilla until stiff peaks form, creating fluffy, lightly sweetened clouds perfect for layering and decorating.
Step 9: Assemble the White Chocolate Raspberry Dream Cake
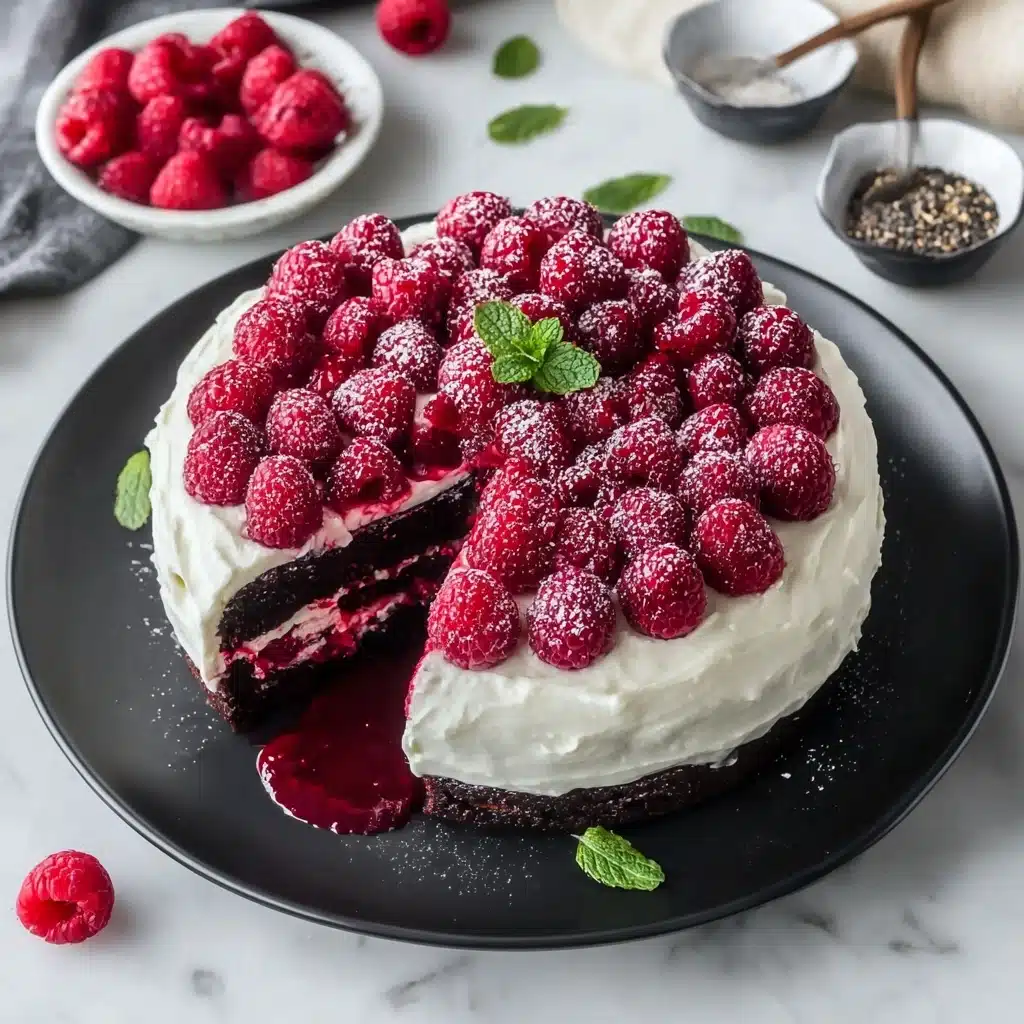
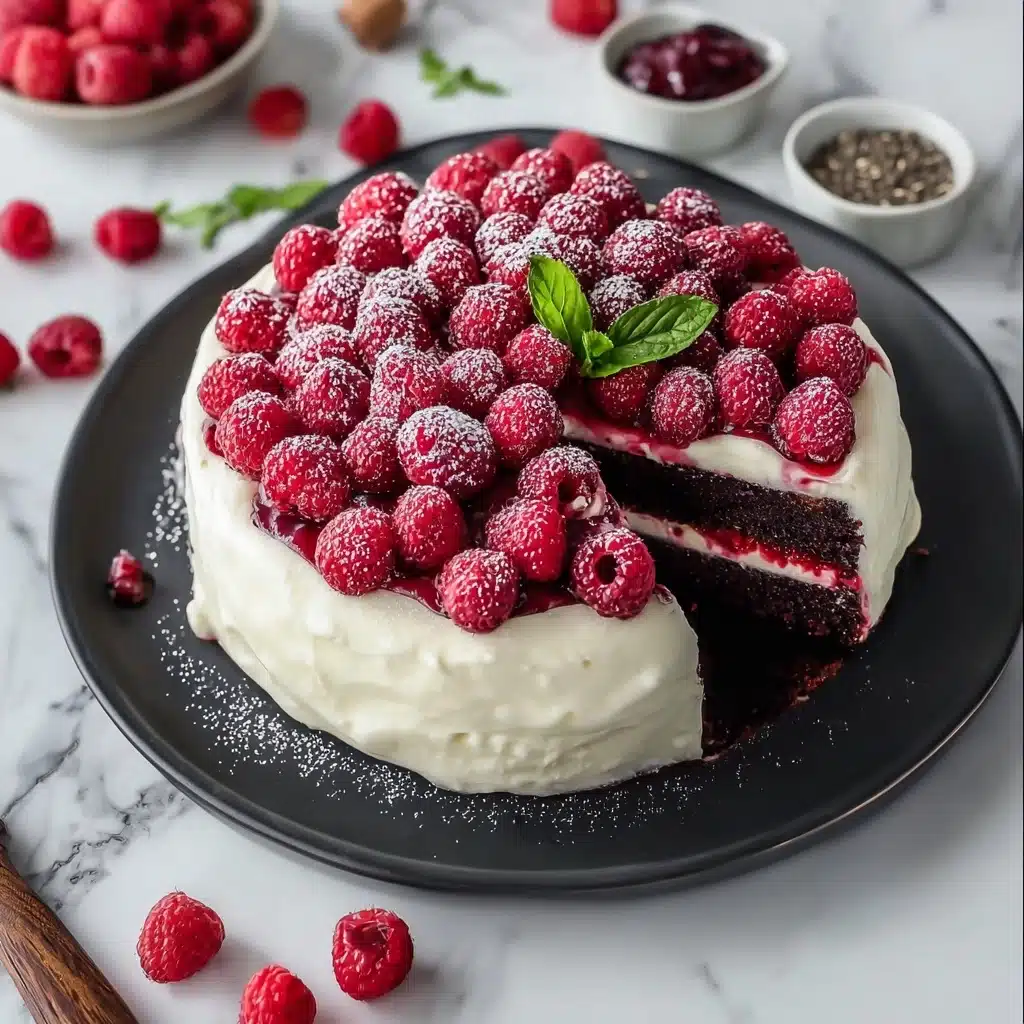
Place one cake layer on a serving platter, spread the raspberry filling on top, then add a thick layer of whipped cream. Gently place the second cake layer on top and cover the entire cake with the remaining whipped cream. Decorate with fresh raspberries arranged on the top for a stunning finish. Chill the cake at least one hour before serving to allow the beautiful flavors to meld and the layers to set.
How to Serve White Chocolate Raspberry Dream Cake
Garnishes
A few fresh raspberries scattered atop the whipped cream not only make the cake look irresistible but also enhance the burst of tartness with every bite. Adding a light dusting of powdered sugar or a few mint leaves elevates the presentation and adds a fresh aroma, perfect for impressing guests.
Side Dishes
This cake is a rich and fruity star, so light accompaniments shine best alongside it. Serve with a simple berry salad, a scoop of vanilla ice cream, or a delicate citrus sorbet. These sides provide contrasting textures and flavors that complement the luscious White Chocolate Raspberry Dream Cake beautifully.
Creative Ways to Present
For an extra-special occasion, try serving slices of this dream cake layered in clear glass trifle bowls, showcasing the vibrant raspberry filling and fluffy cream. Another fun idea is to create mini cakes or cupcakes using the same components, perfect for individual servings that are just as enchanting.
Make Ahead and Storage
Storing Leftovers
Once assembled, the White Chocolate Raspberry Dream Cake should be stored in the refrigerator to keep it fresh and to maintain the cream’s texture. Wrapped tightly with plastic wrap or kept in an airtight container, it will stay delicious for up to 3 days. This makes it ideal for preparing ahead of time for gatherings.
Freezing
If you want to save some for later, you can freeze the baked cake layers (without frosting) wrapped securely in plastic wrap and foil. Freeze for up to 2 months. When ready to enjoy, thaw layers overnight in the refrigerator and then assemble the cake fresh with whipped cream and raspberry filling. This keeps the White Chocolate Raspberry Dream Cake tasting just as dreamy as the day it was made.
Reheating
This cake is best enjoyed chilled because of the whipped cream and raspberry filling. No reheating is needed or recommended, as warmth can cause the cream to lose its fluffiness. Serve straight from the fridge for the perfect combination of textures and flavors.
FAQs
Can I use frozen raspberries instead of fresh?
Yes, frozen raspberries can work in a pinch. Just be sure to thaw and drain them well to reduce excess moisture that could make the cake soggy. The flavor will still be fantastic and complement the white chocolate beautifully.
Is it possible to make this cake dairy-free?
To make this cake dairy-free, substitute the butter with a plant-based alternative, use dairy-free milk like almond or oat milk, and a non-dairy sour cream substitute. For whipped cream, coconut cream whips up wonderfully as a dairy-free alternative that pairs nicely with raspberries.
How do I ensure the cake is moist and fluffy?
The key is not to overmix your batter once the wet and dry ingredients are combined. Also, alternating wet and dry additions and folding in the melted white chocolate gently helps maintain airiness. Be sure to measure your flour correctly to avoid dry cake layers.
Can I make this cake a day in advance?
Absolutely. The White Chocolate Raspberry Dream Cake actually benefits from resting in the fridge for a few hours or overnight, allowing the flavors to meld and the layers to settle for easier slicing.
What is the best way to melt white chocolate for the batter?
Melting white chocolate gently is best done using a double boiler or in short bursts in the microwave, stirring frequently. This prevents burning and helps maintain the smooth, creamy texture needed for the batter.
Final Thoughts
Making the White Chocolate Raspberry Dream Cake is a wonderfully rewarding experience that brings joy not just to your taste buds but to your entire celebration. Every bite combines creamy sweetness and tart fruitiness in a way that feels like a dream you never want to end. I encourage you to try this recipe and share it with your loved ones—it’s bound to become a cherished favorite that you’ll want to bake again and again.
PrintWhite Chocolate Raspberry Dream Cake Recipe

Indulge in the luscious White Chocolate Raspberry Dream Cake, a moist and fluffy layered cake featuring a rich white chocolate-infused batter, fresh raspberry filling, and a decadent whipped cream frosting. This elegant dessert combines the sweetness of white chocolate with the tartness of raspberries, making it perfect for celebrations or a sophisticated treat.
- Prep Time: 25 minutes
- Cook Time: 30 minutes
- Total Time: 1 hour 55 minutes
- Yield: 12 servings 1x
- Category: Dessert
- Method: Baking
- Cuisine: American
- Diet: Vegetarian
Ingredients
Dry Ingredients
- 2 1/2 cups all-purpose flour
- 2 teaspoons baking powder
- 1/2 teaspoon baking soda
- 1/2 teaspoon salt
Wet Ingredients & Batter
- 1 cup unsalted butter
- 1 1/2 cups granulated sugar
- 4 large eggs
- 1 teaspoon vanilla extract
- 1 cup whole milk
- 1/2 cup sour cream
- 6 ounces white chocolate, melted
Filling and Frosting
- 1 1/2 cups fresh raspberries
- 1/2 cup raspberry jam
- 2 cups heavy whipping cream
- 2 tablespoons powdered sugar
- 1 teaspoon vanilla extract
Instructions
- Preheat and Prepare Pans: Preheat your oven to 350°F (175°C). Grease and flour two 9-inch round cake pans thoroughly to prevent sticking.
- Mix Dry Ingredients: In a medium bowl, whisk together the flour, baking powder, baking soda, and salt until evenly combined to ensure an even rise.
- Cream Butter and Sugar: In a large mixing bowl, use an electric mixer on medium speed to cream the unsalted butter and granulated sugar together until light, fluffy, and pale in color, about 3-4 minutes.
- Add Eggs and Vanilla: Add the eggs one at a time, beating well after each addition to fully incorporate. Then mix in the vanilla extract until combined.
- Combine Wet Ingredients: In a separate bowl, stir the whole milk and sour cream together until smooth for an even texture in the batter.
- Alternate Adding Dry and Wet Mixtures: Gradually add the dry ingredients to the butter mixture in three parts, alternating with the milk and sour cream mixture in two parts, beginning and ending with the dry ingredients. Beat on low speed just until combined to avoid overmixing.
- Incorporate White Chocolate: Fold in the melted white chocolate gently using a spatula until fully blended into the batter.
- Divide and Bake: Evenly divide the batter between the prepared pans, smoothing the tops. Bake for 25-30 minutes, or until a toothpick inserted in the center comes out clean.
- Cool Cakes: Let the cakes cool in their pans for 10 minutes before turning them out onto a wire rack to cool completely.
- Prepare Raspberry Filling: Mash the fresh raspberries in a bowl until broken down, then stir in the raspberry jam until combined perfectly.
- Make Whipped Cream: In a large bowl, beat the heavy whipping cream, powdered sugar, and vanilla extract on high speed until stiff peaks form for a stable, fluffy frosting.
- Assemble the Cake: Place one cake layer on a serving platter. Spread the raspberry filling evenly over the top, then add a generous layer of whipped cream. Top with the second cake layer, pressing gently to secure.
- Frost and Garnish: Spread the remaining whipped cream evenly over the top and sides of the cake. Decorate the top with fresh raspberries arranged decoratively.
- Chill and Serve: Refrigerate the finished cake for at least 1 hour to allow the layers to set before slicing and serving. Enjoy your creamy, fruity dessert!
Notes
- For best results, ensure all ingredients are at room temperature before beginning.
- Use high-quality white chocolate to enhance the cake’s flavor and texture.
- The cake can be stored in the refrigerator for up to 3 days, covered to prevent drying out.
- Fresh raspberries can be substituted with frozen ones, but thaw and drain them well to avoid excess moisture.
- If desired, add a splash of lemon zest to the batter for a subtle citrus twist.
- Allow the cake layers to cool completely before assembling to prevent the whipped cream from melting.
Nutrition
- Serving Size: 1 slice (1/12 of cake)
- Calories: 420
- Sugar: 32g
- Sodium: 210mg
- Fat: 28g
- Saturated Fat: 16g
- Unsaturated Fat: 10g
- Trans Fat: 0.5g
- Carbohydrates: 38g
- Fiber: 2g
- Protein: 5g
- Cholesterol: 105mg
Keywords: white chocolate cake, raspberry cake, layered cake, whipped cream frosting, fruit filling, dessert recipe, party cake